
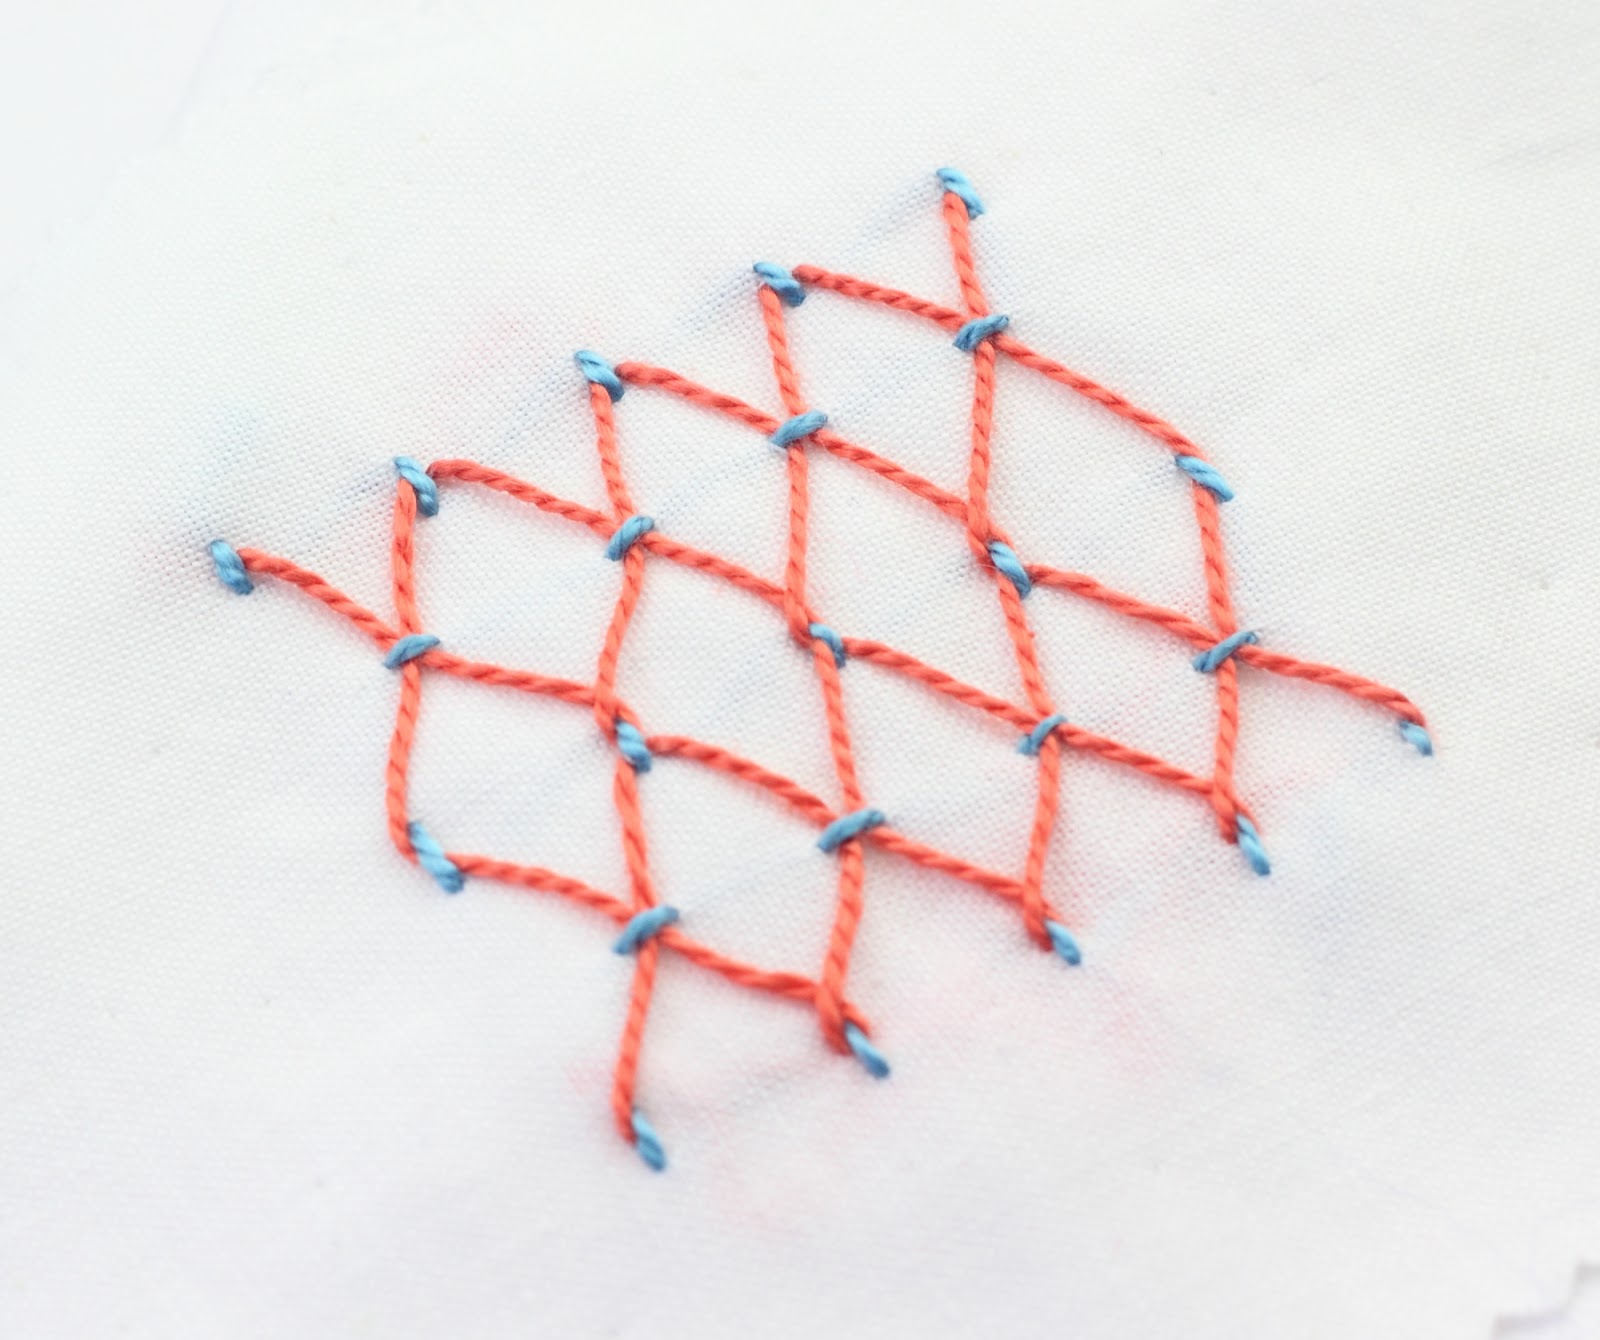
This intricate stitch is the Fancy Stitch. It is the most recent stitch I have learned on my 100 Stitches Plus journey.
This is a filling stitch and is made up of columns and rows that are evenly spaced. The stitches used are vertical Straight Stitches and horizontal Running Stitch. Then a contrasting colored thread is passed under the stitches.

The Fancy Stitch may look complicated, but it isn't. It just requires some measuring and pre-marking to space your stitches.
I followed the instructions for the stitch from the book Embroidery Stitches by Mary Webb. The picture of the stitch shows five columns and five rows made up of both vertical and horizontal stitches.
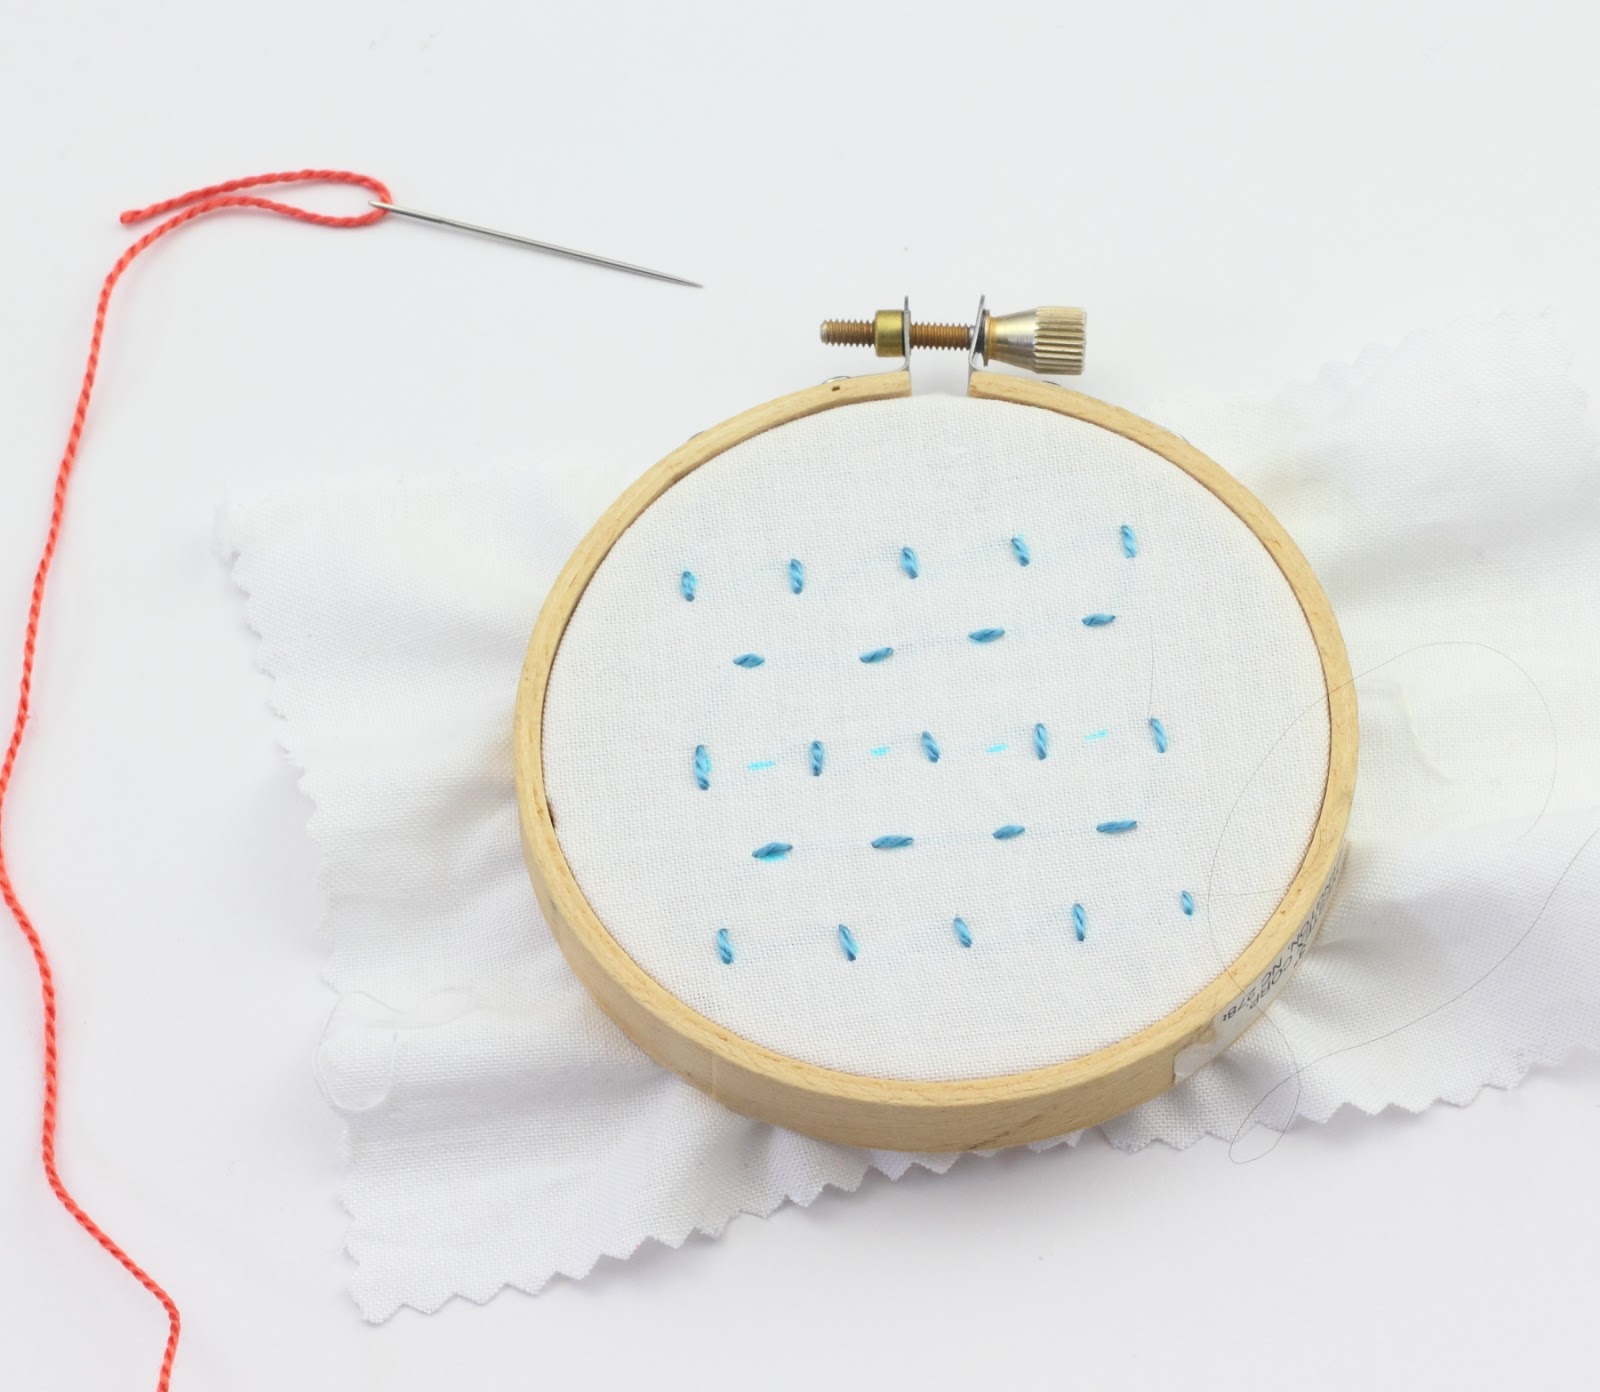
To keep my spacing accurate, I actually drew out a grid and then transferred it to my fabric with my water soluble marking pen.
I started the first column by making a vertical Straight Stitch on the top row of marks:


Then I continued along that row, making five vertical Straight Stitches:

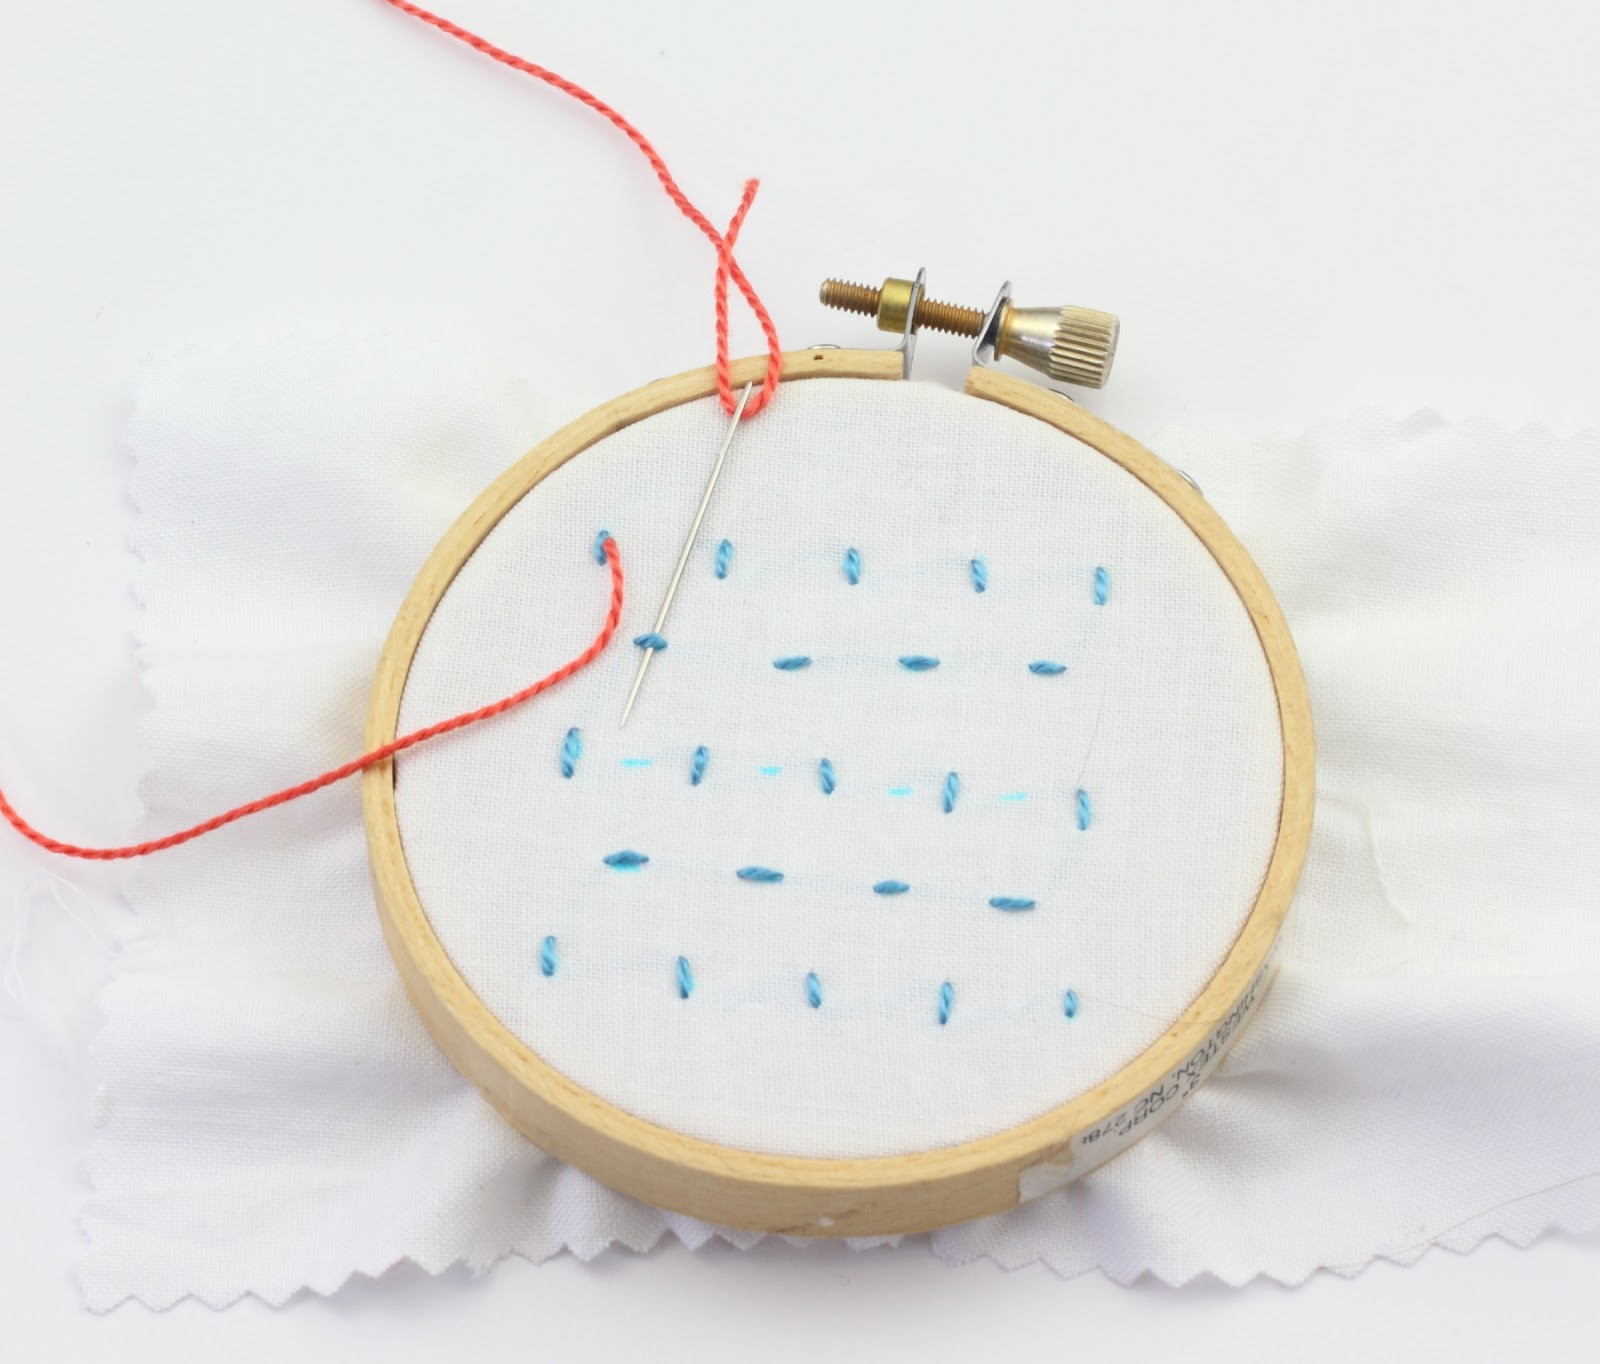
Next, I started on the second row. I worked the Running Stitch horizontally from right to left:

making sure the stitches were evenly spaced between the vertical stitches:

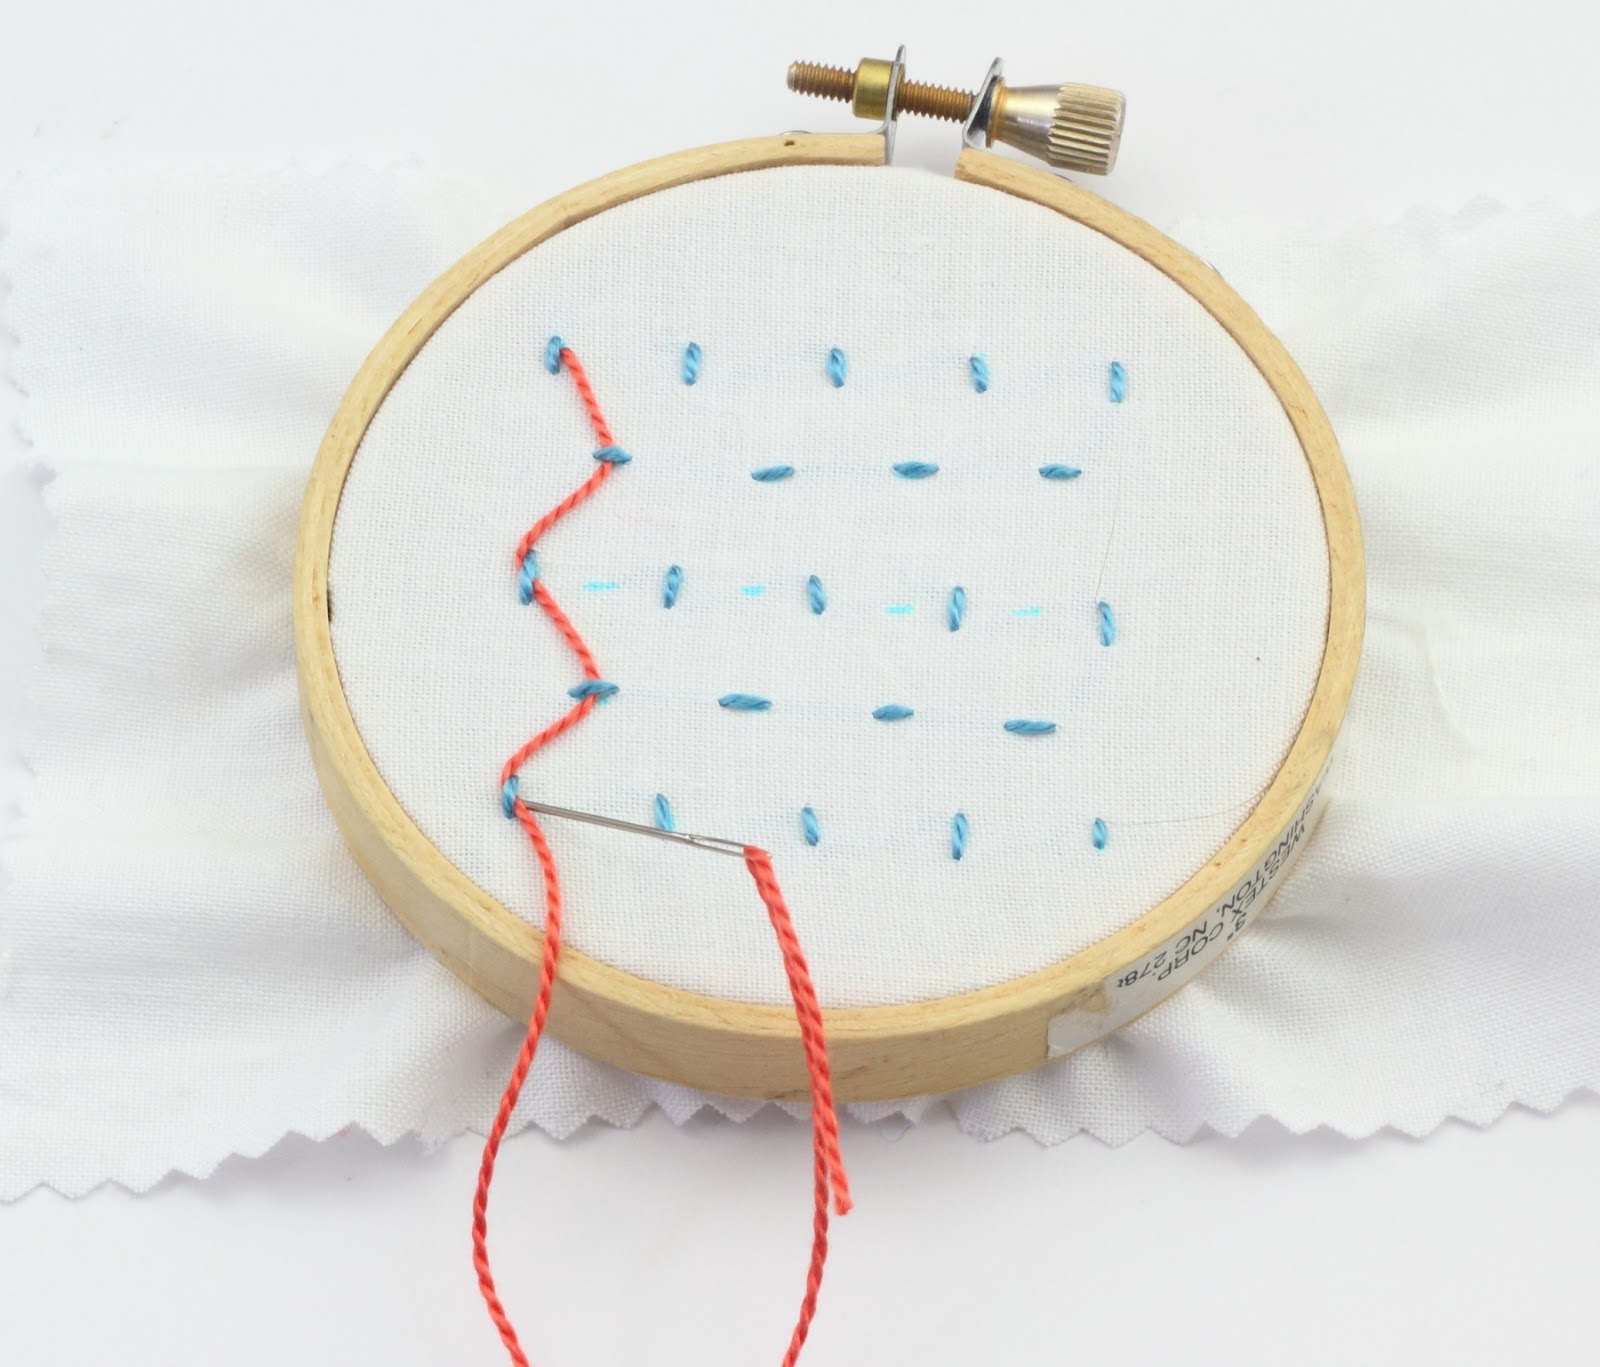
When that row was done, I started the next set of the vertical stitches

and so on until all the stitches were done.
Now for the contrasting color floss:
According to the instructions, each column is to be worked individually and from top to bottom. And for the three inner columns, each will be worked on the left and right sides of the vertical Straight Stitches.
I started on at the top of the first column. I came up through the fabric on the right side of the first vertical Straight Stitch:

I pulled the floss all the way through and then slid the needle under the first horizontal Running Stitch. Notice that the needle is sliding on top of the fabric but under the stitches:
I wove the floss in and out of each stitch in this first column:


and then went back into the fabric on the right side of the last Straight Stitch at the bottom of the column:
I started the next column on the left side of the top stitch.


Then I worked the right side of that column:


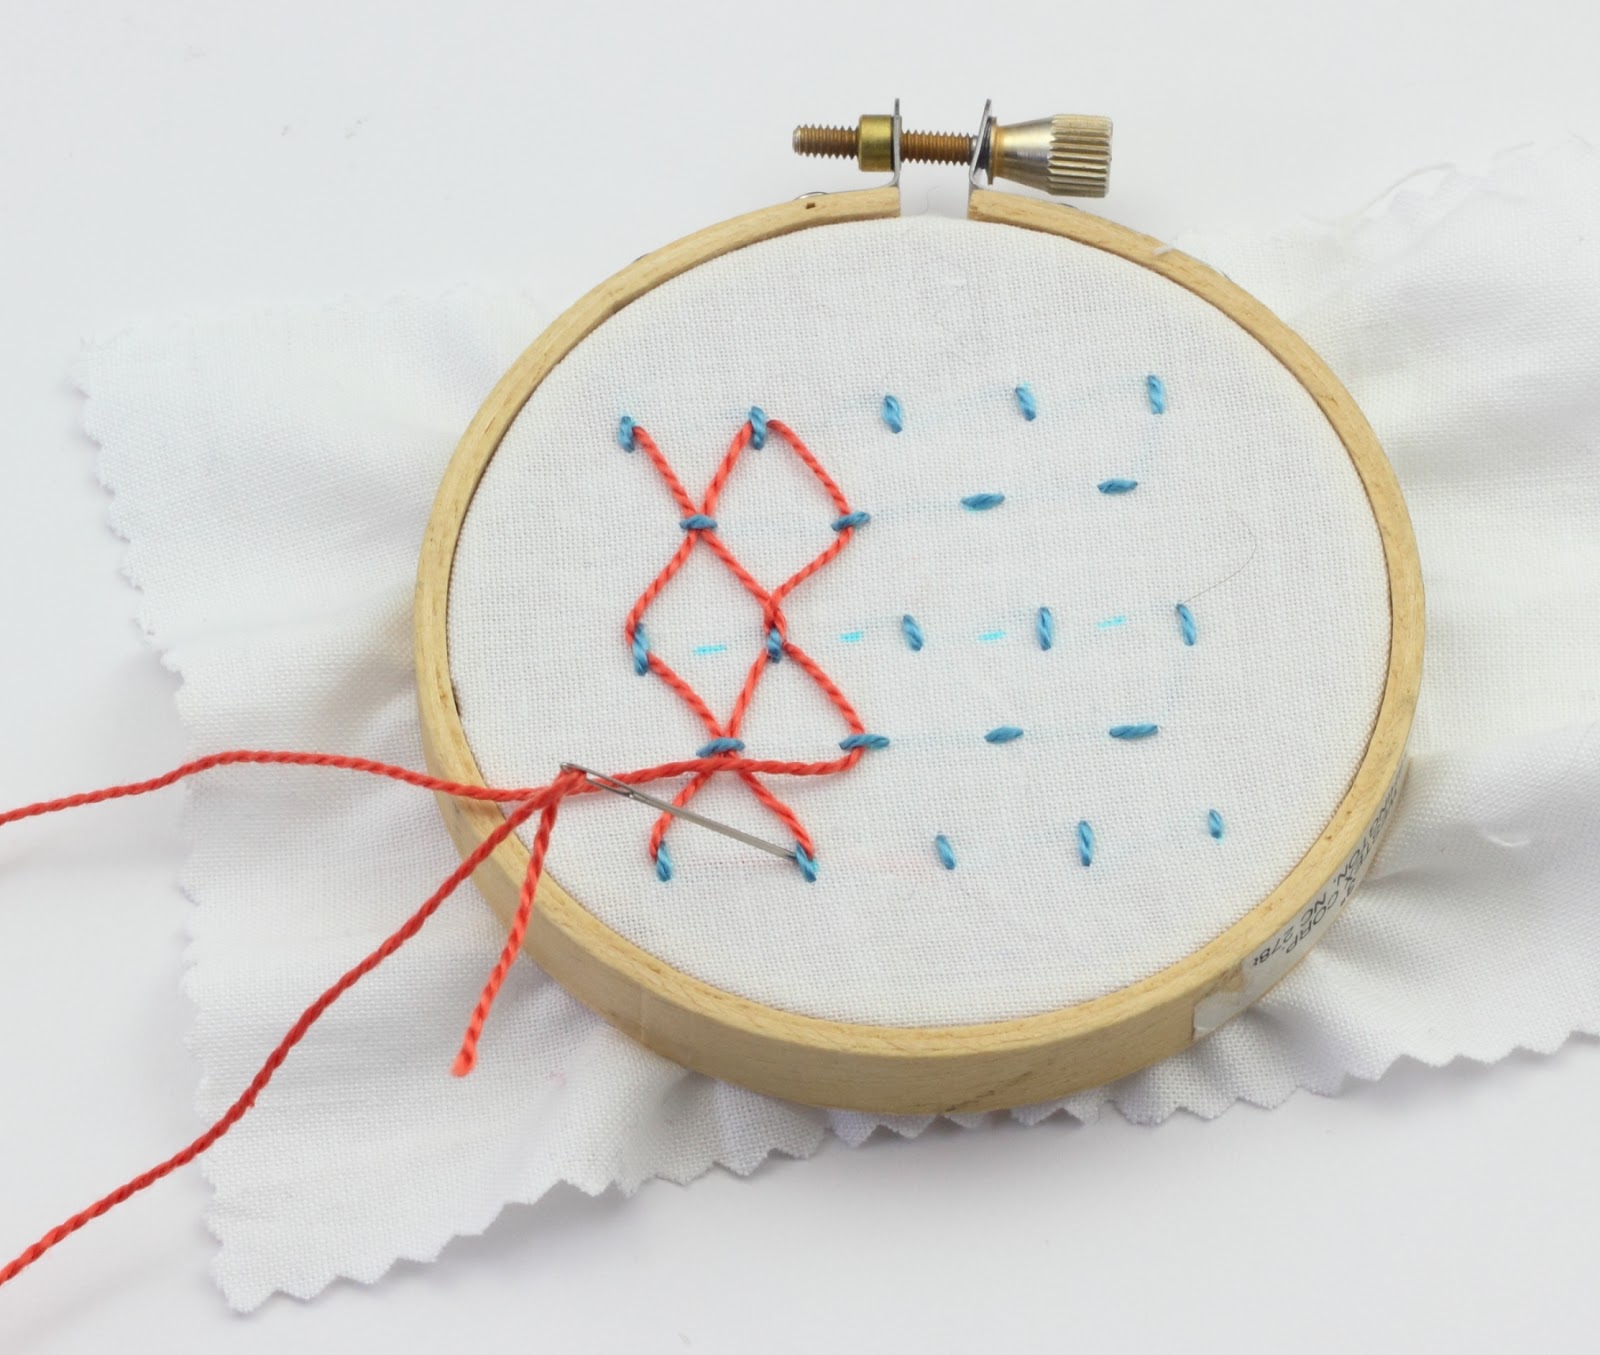
I repeated these steps until all the columns were done:
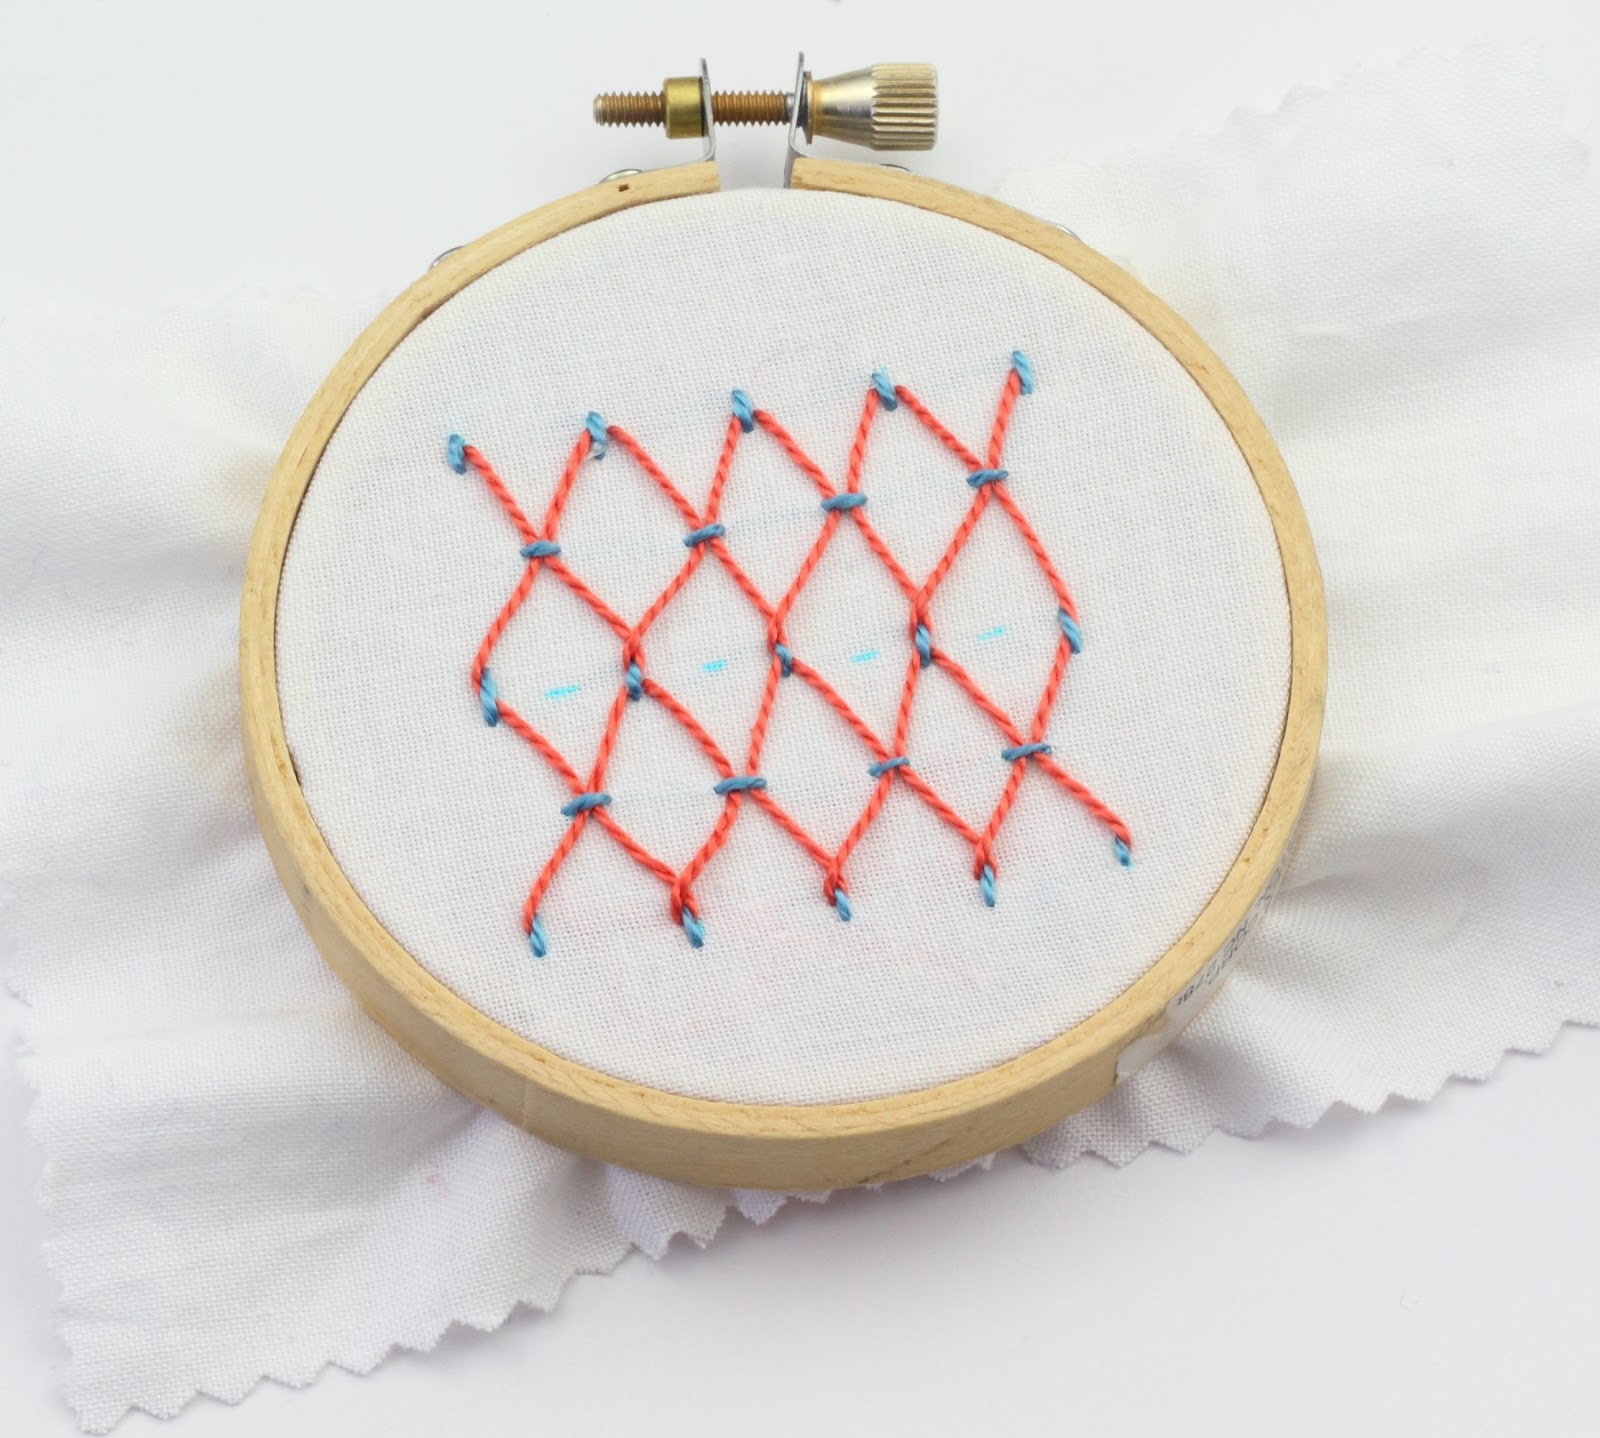
Here is the finished stitch with the marking lines rinsed away:

This stitch is dramatic looking and I think it would be a useful stitch for filling large areas.
The floss I used for this stitch is perle cotton floss from DMC. The blue is number 807 and the coral is number 351.


2 comments:
absolutely amazing. Thanks for this great look.
embroidery library
Great! We're doing as well and have some exciting offers..
custom embroidery digitizing services
Post a Comment